
Appearance
Y406-22/44/66/88/GG-L LoRa Wireless Controller User Manual
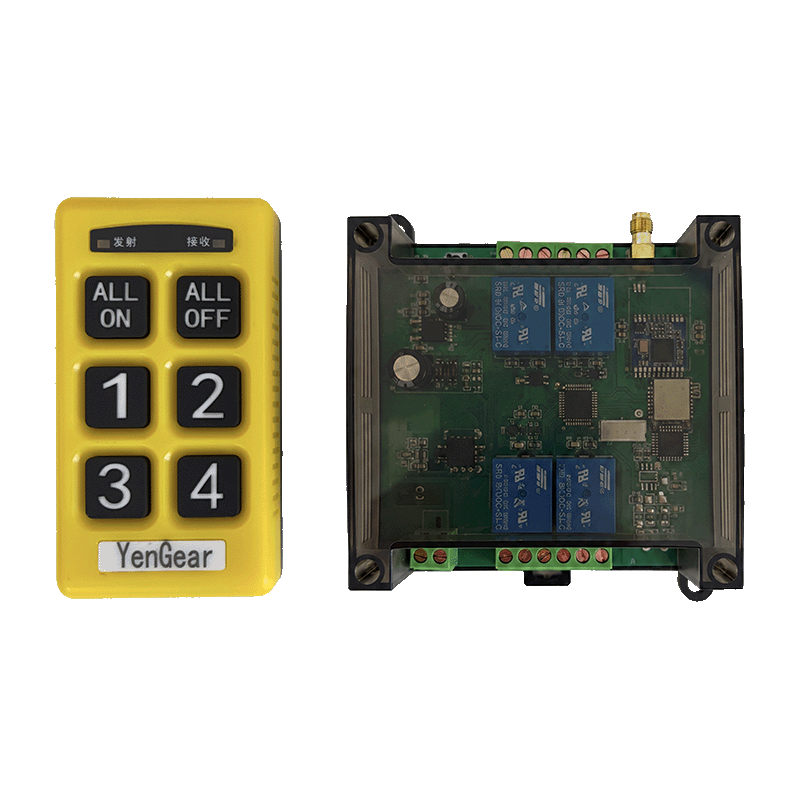
Product Introduction
Applicable models: Y406-22-L, Y406-44-L, Y406-66-L, Y406-88-L, and Y406-GG-L. Use the Specification for model selection, ratings, and dimensions.
Y406 uses a handheld LoRa remote to operate relay-controlled equipment. Compatible PLC expansion-board firmware also provides remote key states over RS485/Modbus RTU; see PLC Integration.
Operating Logic
Remote Keys
Use the supplied key labels and configuration to identify each key's equipment and output action. Before using ALL ON or ALL OFF, identify every affected load.
The TX and RX indicators on Y406T-44-L show transmit/receive activity. A receipt acknowledgement means the module received the command; verify relay and equipment operation directly.
Installation and Wiring
Mounting and Antenna
Connect the matching antenna before operation. Keep it clear of large metal surfaces, and leave access to the connector and wiring terminals. Use the controller's mounting drawing for hole positions and clearances.
Power and Relay Wiring
- Disconnect controller and load power before wiring.
- Connect a 9–72 V DC supply to the marked power terminals, observing polarity.
- Wire the equipment control circuit through the relay contacts shown on the supplied terminal drawing. Check load voltage and current against the model's contact rating.
- Select overcurrent protection, surge suppression, and any external contactor for the actual load. Keep operational loads isolated during initial tests.
For PLC expansion-board wiring and serial settings, see PLC Integration.
Pairing and Configuration
Remote Pairing
Use the remote supplied for the controller and follow its pairing instructions. If pairing fails, contact YenGear with both model numbers.
Remote Configurator
Remote configuration requires a compatible handheld remote, BLE configuration module, and firmware. Open Remote Configurator for supported setups.
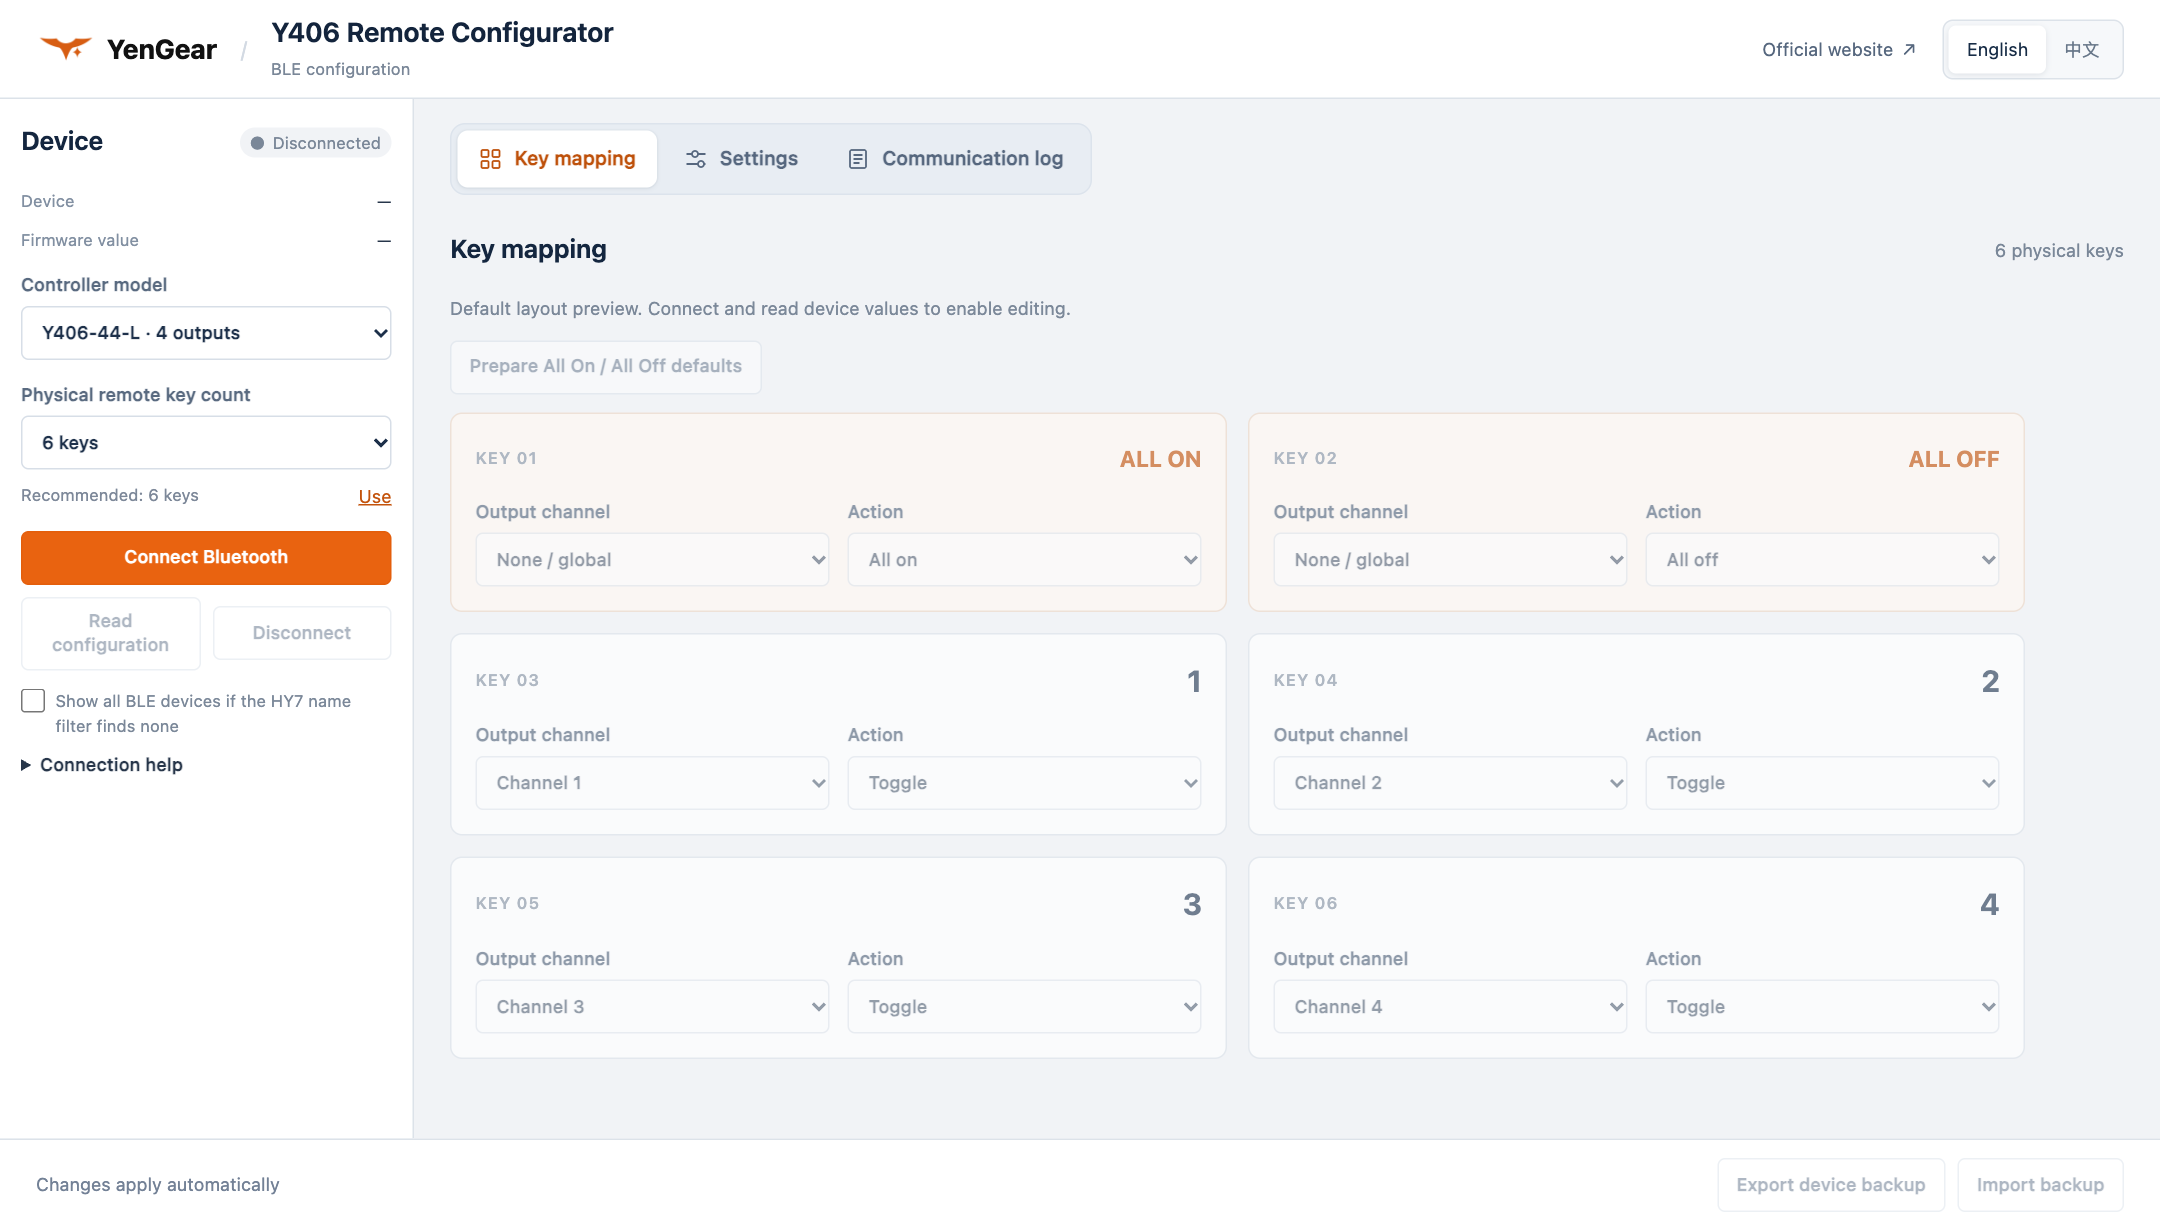
- Open Remote Configurator in desktop Chrome over HTTPS on a computer with Bluetooth enabled. Disconnect other configuration apps from the device.
- Select the controller model and the physical remote key count to match the supplied equipment.
- Choose Connect Bluetooth and select the compatible configuration device. The tool reads its current configuration after connecting.
- Review the settings, then edit the key mappings or other supported parameters with operational loads isolated. After reading the device configuration, the tool saves edits automatically.
- Wait for the save and readback confirmation, then test the key actions before returning the equipment to service. Use Export device backup to keep a copy of the configuration.
Use Read configuration to refresh the device settings. If disconnected, reconnect and read the configuration before writing again.
Commissioning
- Verify the supply voltage, polarity, wiring, antenna connection, and load ratings.
- With operational loads isolated, test each remote key and its relay contact action.
- Observe both press and release behavior, including any ALL ON or ALL OFF keys supplied.
- Reconnect the loads and test one equipment action at a time under controlled conditions.
- For PLC integration, read and validate the key-state register with the supplied protocol. Test press, hold, release, and simultaneous keys where required, then verify the PLC output logic.
- Test remote power loss, wireless loss, RS485 loss, and controller power recovery separately under safe conditions. Watch for unintended equipment startup before returning to normal operation.
During a controlled equipment test, press and release one key at a time and compare the action with its supplied configuration. Confirm the operating area is clear before reconnecting loads.
Troubleshooting
| Symptom | Checks |
|---|---|
| Remote does not operate the controller | Verify controller and remote power. Inspect the antenna connection and radio path, then follow the supplied pairing instructions for the compatible remote. |
| Controller responds but equipment does not operate | Inspect the relay contact action, terminal wiring, load supply, and equipment protection devices. |
| A key operates unexpected equipment | Compare the key label, supplied configuration, and output wiring. Stop operation until the mapping is corrected. |
| RS485 communication fails | Match A/B wiring, serial settings, device address, and commands to the supplied protocol. |
| Operation changes after a power interruption | Keep equipment in a safe state and test the unit's startup behavior before resuming use. |
If the problem continues, provide technical support with the controller model, actual DC supply voltage, remote model, wiring photograph, and a description of the fault. For an RS485 fault, also provide the communication settings and sent/received data.
Safety Notes
- Do not use wireless operation as a safety-rated emergency stop or for control requiring guaranteed timing.
- Disconnect power before changing wiring or inspecting the controller.
- Keep the antenna and terminals secure, and inspect connections before returning equipment to service.
Appendix: PLC Integration
The PLC is the Modbus RTU master; the communication module is the slave. The PLC reads remote key states and runs the output logic.
text
Handheld remote → LoRa → Communication module → RS485 / Modbus RTU → PLC logic → Equipment outputsThis read protocol applies to the PLC communication expansion board. Y406 relay controllers require the register map and commands for their own firmware.
RS485 Connection
Disconnect power before wiring RS485. Identify the A/B terminals from both devices' terminal drawings and wire the bus with the correct polarity. A/B labels alone may differ between vendors.
Follow the grounding, termination, and biasing requirements for the installation. Match the PLC settings to the module's address and serial format.
Communication Parameters
| Parameter | PLC expansion-board setting |
|---|---|
| Protocol | Modbus RTU |
| PLC / module roles | Master / slave |
| Default slave address | 1 (0x01) |
| Default baud rate | 9600 bit/s |
| Serial format | 8 data bits, no parity, 1 stop bit (8N1) |
| Read function | 0x03 — Read Holding Registers |
| Key-state read address / quantity | Wire address 0x0000 / 1 register |
| Register data byte order | High byte first |
| CRC byte order | Low byte first |
Register Map
Read the key-state register with function 03 at wire address 0x0000.
| Wire address | Register | Read function | Data |
|---|---|---|---|
0x0000 | Keys 1–16 | 03 | One 16-bit word; bits 0–15 represent key states |
Parameter changes, factory reset, and onboard relay control require separate commands for the supplied firmware. The key-state read request performs none of these operations.
Remote Key-State Mapping
The key-state word contains 16 bits. A set bit (1) means the corresponding key is pressed; a cleared bit (0) means it is released.
| Key | Bit | Mask | Key | Bit | Mask |
|---|---|---|---|---|---|
| 1 | 0 | 0x0001 | 9 | 8 | 0x0100 |
| 2 | 1 | 0x0002 | 10 | 9 | 0x0200 |
| 3 | 2 | 0x0004 | 11 | 10 | 0x0400 |
| 4 | 3 | 0x0008 | 12 | 11 | 0x0800 |
| 5 | 4 | 0x0010 | 13 | 12 | 0x1000 |
| 6 | 5 | 0x0020 | 14 | 13 | 0x2000 |
| 7 | 6 | 0x0040 | 15 | 14 | 0x4000 |
| 8 | 7 | 0x0080 | 16 | 15 | 0x8000 |
For example, 0x0005 has bits 0 and 2 set: keys 1 and 3 are pressed. Map the bits to the supplied remote's key numbering. The word's 16-bit capacity is separate from the physical key and relay counts.
The expansion board and remote default to single-key mode. Pressing several keys together stops command transmission. Simultaneous-key operation requires multi-key mode on both devices; stopped transmission does not report a key release.
Read Request and Response Examples
Frames use hexadecimal bytes in transmission order. To read one key-state register at address 0 from slave 1, the PLC sends:
text
01 03 00 00 00 01 84 0A| Bytes | Meaning |
|---|---|
01 | Slave address 1 |
03 | Read Holding Registers |
00 00 | Starting wire address 0 |
00 01 | Read 1 register |
84 0A | CRC16, low byte first |
For PLC software using one-based or 4xxxx register labels, choose the setting that sends starting-address bytes 00 00. The request remains the same for each key state.
| Remote state | Complete response | Key-state word |
|---|---|---|
| No key pressed | 01 03 02 00 00 B8 44 | 0x0000 |
| Key 1 pressed | 01 03 02 00 01 79 84 | 0x0001 |
| Keys 1 and 3 pressed | 01 03 02 00 05 78 47 | 0x0005 |
In a normal response, 02 is the data-byte count. The next two bytes contain the key-state word, high byte first; the final two bytes contain the CRC.
Validate the slave address, function code, byte count, frame length, and CRC before decoding the key states. Handle exception responses and timeouts separately. Let the PLC's Modbus library generate the request CRC, or calculate it with initial value 0xFFFF and reflected polynomial 0xA001.
PLC Logic and Feedback
The PLC program assigns hold-to-run, toggle, or separate start/stop actions to the key bits. For toggle control, trigger on a new key press rather than on each poll. Initialize edge detection after startup or communication recovery.
PLC-to-remote display feedback requires a compatible LCD remote and the feedback commands for the supplied firmware. The key-state word represents remote keys, not relay or equipment status.
A valid RS485 reply alone does not establish that the wireless key state is current. Set the PLC timeout and output behavior for communication loss and recovery during commissioning.